Practical Shelling Guides & Field Advice
Essential field guides for beachcombers: identifying living vs empty specimens, Florida conservation laws, ethical beachcombing rules, and safe preservation.
Field Skills & Conservation Ethics for Shellers
Successful and ethical beachcombing requires more than just knowing shell names. It demands understanding living animal biology, tidal hydrodynamics, conservation statutes, and safe preservation techniques. Our practical guides provide tested, source-backed answers to the most common dilemmas beachcombers face along coastal shores.
Published Practical Guides
Researched field guides covering living animal detection, wildlife laws, and preservation science:
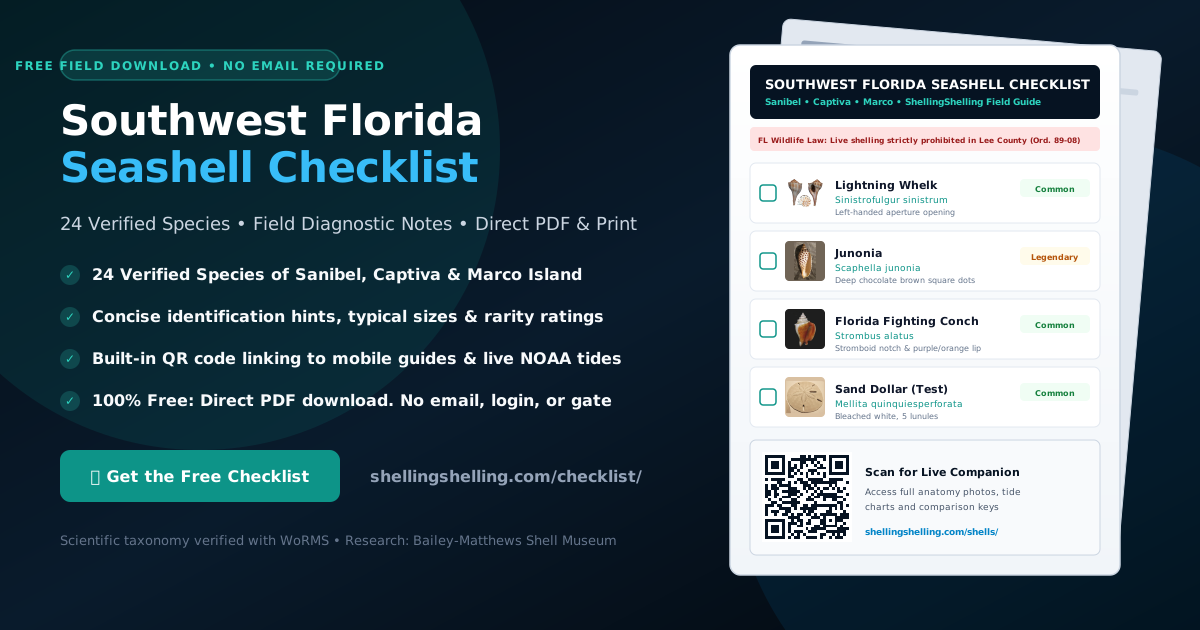
Southwest Florida Seashell Checklist
Printable 24-species field checklist covering Sanibel, Captiva, and Marco Island. Features real specimen photos, checkboxes, diagnostic field hints, and mobile QR companion. Direct download — no email required.
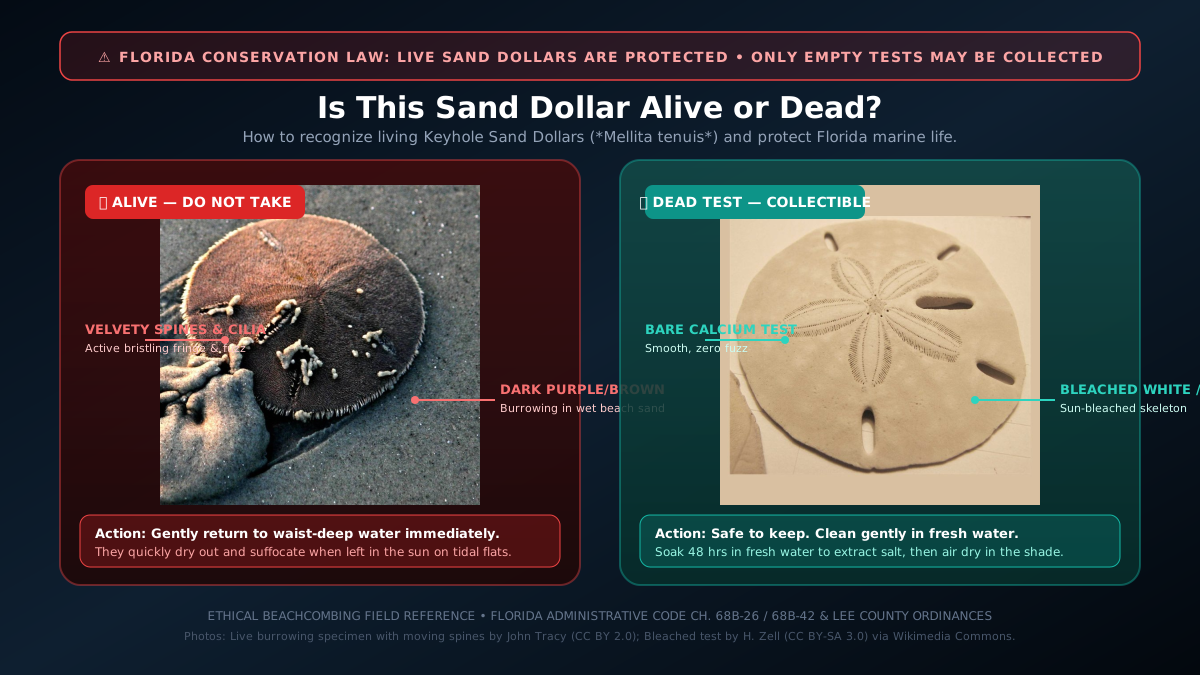
Is This Sand Dollar Alive or Dead?
How to tell if a Keyhole Sand Dollar (Mellita tenuis) is alive or dead: Living cilia velvet vs bare calcium test, movement test, and Florida wildlife harvesting laws.
Florida Shelling Laws: Live Shelling is Prohibited
Across Lee County, Florida (Sanibel, Captiva, Fort Myers Beach), harvesting any living seashell or sand dollar is strictly illegal under Lee County Ordinance 89-08 / 04-20 and Florida Administrative Code (F.A.C.) Rule 68B-26.004. In federal wildlife refuges (like J.N. "Ding" Darling NWR) and National Parks, collecting any natural objects—including dead empty shells—is strictly prohibited by federal law. In contrast, Florida State Parks (such as Cayo Costa) permit collecting empty seashells, sea glass, and shark teeth between the water line and the dunes (Chapter 62D-2, F.A.C.), while taking living creatures or disturbing coastal dunes is forbidden. Always check local park regulations before collecting.
Diagnostic Seashell Anatomy Fundamentals
Recognizing key anatomical structures makes visual identification immediate and reliable. Examine these key features when inspecting specimens along the wrack line:
Gastropod (Snail) Anatomy
- Apex & Protoconch: The initial tip of the shell formed during embryonic larval development. Bulbous in Junonias; pointed in whelks.
- Spire & Whorls: The coiled revolutions above the final body whorl. Count whorls and examine suture depth between coils.
- Body Whorl: The largest, final revolution containing the soft animal body, spanning the main volume of the shell.
- Aperture: The main opening. Check whether it opens to the left (sinistral / Lightning Whelk) or right (dextral / Knobbed Whelk).
- Columella: The central pillar or inner lip. Look for diagnostic folds/plaits (Junonia, Tulips) or smooth glazed shields.
- Siphonal Canal: The extended spout through which the snail draws water to its gills. Long in whelks; notched in conchs.
- Stromboid Notch: A distinct anterior lip indentation on true conchs (Fighting Conch) for the snail's right eyestalk.
Bivalve & Echinoderm Anatomy
- Umbo & Beak (Bivalves): The earliest formed dorsal point of each valve above the hinge.
- Hinge & Ligament: Interlocking teeth and elastic ligament holding the two valves together.
- Radial Ribs: Raised ridges radiating outward from the umbo toward margins (prominent on Giant Cockles and Lion's Paws).
- Pallial Line & Sinus: Interior scar line marking mantle attachment, with sinus notch showing siphon retraction.
- Echinoderm Test (Sand Dollars): The rigid internal calcium carbonate skeleton, distinctly flat and circular.
- Lunules: Diagnostic narrow slots (5 in the Keyhole Sand Dollar) that allow water currents to pass without lifting the test.
- Petaloid Ambulacra: The distinctive five-petal flower respiratory pattern visible on the upper (aboral) test surface.
Safe Shell Cleaning & Ethical Preservation
Once you have verified that a find is 100% empty and dead, clean and preserve it safely without damaging delicate pigments, periostracum layers, or calcium crystal structures.
1. Fresh Water Salt Leaching
Soak empty shells in a bucket of clean fresh tap water for 3 to 7 days, replacing the water once every 24 hours. This gently dissolves deep salt crystals that would otherwise effloresce, crumble, or cloud the porcelain shine over time.
2. Gentle Mechanical Scrubbing
Use a soft-bristled toothbrush with mild liquid dish soap to lift stubborn beach debris, mud, and sand out of suture lines and the siphonal canal. Avoid abrasive steel wool or wire scouring pads, which scratch natural gloss.
3. Preserving Sand Dollar Tests
For white, empty sand dollar skeletons, gently leach in fresh water and air-dry thoroughly in shaded breezes. To harden brittle tests against fracturing, brush with a gentle solution of 1 part matte water-based PVA craft glue diluted in 3 parts water.
⚠️ What to Avoid
Never use muriatic or strong mineral acids: Acid chemically dissolves calcium carbonate, permanently etching surfaces and erasing subtle brown spot patterns. Never boil thin shells: Extreme heat expansion fractures crystal lattices and peels the natural organic periostracum.
Related Field Tools & Research Queue
Looking for tide charts, Sanibel beach logistics, or printable field checklists while additional practical guides are in our research queue? Use our interactive tools and regional beach guides below: